Hey there! As an I-beam supplier, I've had my fair share of folks scratching their heads over how to measure an I-beam. It's not as tricky as it might seem at first glance, but getting it right is super important, whether you're using these I-beams for construction, solar projects, or other industrial applications. So, let's dive right in and break down the whole process step by step.
Why Measuring I-beams Matters
Before we get into the nitty - gritty of measuring, let's talk about why it's so crucial. I-beams are used in a ton of different projects, from building skyscrapers to setting up High Quality Solar Bracket. If you don't measure them correctly, you could end up with a structure that's not stable or a solar panel installation that doesn't work as it should. In short, accurate measurements are the foundation of a successful project.
Tools You'll Need
First things first, you gotta have the right tools for the job. Here's what you'll need:
- A tape measure: A good, long tape measure is a must - have. Make sure it's accurate and in good condition.
- A caliper: This is great for measuring smaller dimensions with high precision.
- A level: To ensure that the I-beam is straight and level during measurement.
Measuring the Flange Width
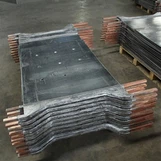
The flanges are the horizontal parts at the top and bottom of the I-beam. Measuring the flange width is pretty straightforward. Just place your tape measure across the widest part of the flange. Make sure the tape measure is parallel to the edge of the flange. Measure both the top and bottom flanges, as sometimes there can be slight variations. Write down the measurements. Usually, the flange width is an important factor when it comes to fitting the I-beam into a specific structure or when calculating the load - bearing capacity.
Measuring the Web Thickness
The web is the vertical part connecting the two flanges. Measuring the web thickness can be a bit more challenging. You can use a caliper for this. Place the caliper jaws on either side of the web at a few different points. The web thickness can vary along the length of the I-beam, so it's a good idea to take multiple measurements. Record the smallest and largest measurements. This information is crucial for engineers and architects when they're designing structures that use these I-beams.
Measuring the Overall Height
The overall height of the I-beam is measured from the outer edge of one flange to the outer edge of the other flange. Use your tape measure and make sure it's straight up and down. Hold the tape measure firmly against the I-beam to get an accurate reading. This measurement is important for determining how the I-beam will fit into a construction project. For example, if you're using it in a building, the height will affect the ceiling height and the overall layout.


Measuring the Length
Measuring the length of the I-beam is usually the easiest part. Just stretch your tape measure along the length of the beam from one end to the other. Make sure the tape measure follows the centerline of the I-beam. If the I-beam has any curves or bends, you might need to measure in sections and then add up the lengths.
Checking for Straightness
An I-beam that's not straight can cause all sorts of problems. Use a level to check if the I-beam is straight. Place the level on the top flange and see if the bubble is centered. Do this at several points along the length of the beam. If the beam is bent, it might need to be straightened or replaced, depending on the severity of the bend.
Considering Tolerances
It's important to understand that there are always tolerances in manufacturing. This means that the actual measurements of an I-beam might vary slightly from the specified dimensions. When you're measuring, keep these tolerances in mind. For example, if the specified flange width is supposed to be 10 inches, it might be acceptable for it to be between 9.95 and 10.05 inches, depending on the manufacturing standards.
Measuring for Special Applications
If you're using the I-beam for a special application, like in a Shaped Steel or Z-shaped Steel Purlin setup, you might need to take additional measurements. For instance, if you're using it in a solar panel installation, you'll need to measure the holes or slots in the I-beam that are used for mounting the solar panels. Use a caliper or a small tape measure to get these measurements.
Double - Checking Your Measurements
Once you've taken all the measurements, double - check them. It's easy to make a mistake, especially if you're in a hurry. Go over each measurement again and make sure you've written them down correctly. You can also have someone else check your work. This extra step can save you a lot of headaches later on.
Using the Measurements
After you've measured the I-beam, you can use the measurements in a variety of ways. If you're an engineer, you'll use them to design structures. If you're a contractor, you'll use them to ensure that the I-beam fits properly into the project. And if you're a DIY enthusiast, you'll use them to make sure you're using the right I-beam for your project.
Conclusion
Measuring an I-beam is a skill that anyone involved in construction, engineering, or solar projects should have. With the right tools and a bit of patience, you can get accurate measurements every time. Remember, accurate measurements are the key to a successful project.
If you're in the market for high - quality I-beams or have any questions about measuring or using them, don't hesitate to reach out. We're here to help you with all your I-beam needs. Whether you're working on a small DIY project or a large - scale construction job, we've got the right I-beams for you. Contact us for more information and to start your procurement process.
References
- Construction Materials Handbook
- Engineering Guide for Structural Steel