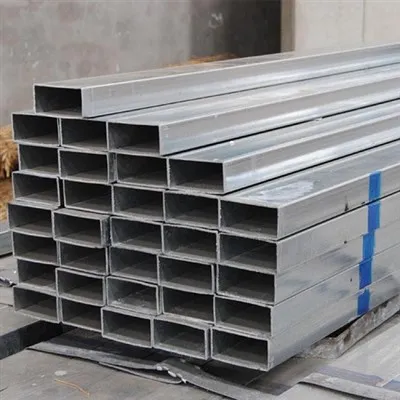
As a supplier of solar mount brackets, I understand the crucial role that accurate measurements play in the installation of solar panels. In this blog post, I'll share my insights on how to measure for solar mount brackets, ensuring a successful and efficient installation process.
Understanding the Basics of Solar Mount Brackets
Before diving into the measurement process, it's essential to have a clear understanding of what solar mount brackets are and their types. Solar mount brackets are structural components that secure solar panels to various surfaces, such as rooftops, ground mounts, or tracking systems. They come in different shapes, sizes, and materials to accommodate different solar panel configurations and installation requirements.
There are several types of solar mount brackets, including Rooftop Photovoltaic Bracket, which are designed for installation on rooftops; photovoltaic mounting bracket, a more general term that encompasses various mounting solutions; and Zinc Alloy Photovoltaic Bracket, known for their durability and corrosion resistance.
Pre - measurement Considerations
Site Assessment
The first step in measuring for solar mount brackets is to conduct a thorough site assessment. This involves evaluating the installation location, including the type of surface (rooftop, ground, etc.), its orientation, and any potential obstacles. For rooftop installations, check the roof's material (e.g., asphalt shingles, metal, tile), slope, and structural integrity. Ground - mount installations require an assessment of the soil type, drainage, and available space.
Solar Panel Specifications
Gather detailed information about the solar panels you plan to install. This includes the panel's dimensions (length, width, and thickness), weight, and the number of panels in the system. The size and weight of the panels will directly influence the type and size of the mount brackets needed.


Measuring for Rooftop Solar Mount Brackets
Step 1: Determine the Panel Layout
Decide on the layout of the solar panels on the roof. Consider factors such as the available roof space, the orientation of the panels for maximum sunlight exposure, and any shading issues. Sketch out a rough diagram of the panel layout, indicating the position of each panel.
Step 2: Measure the Roof Dimensions
Use a tape measure to measure the length and width of the roof area where the solar panels will be installed. Measure from the edge of the roof to the opposite edge, taking into account any eaves or overhangs. Also, measure the roof slope. You can use a level and a protractor to determine the angle of the roof slope. This information is crucial for selecting the appropriate mount brackets that can accommodate the roof's angle.
Step 3: Calculate the Panel Spacing
Determine the spacing between the solar panels. This spacing is important for proper ventilation and to prevent shading between panels. A common spacing is around 2 - 3 inches between panels. Measure the distance between the center points of adjacent panels and mark these points on the roof.
Step 4: Locate Mounting Points
Based on the panel layout and spacing, mark the mounting points on the roof. For most rooftop installations, the mount brackets are attached to the roof rafters. Use a stud finder to locate the rafters and mark their positions on the roof. The mounting points should be evenly spaced and aligned with the panel layout.
Step 5: Measure the Mounting Holes
Once the mounting points are marked, measure the distance between the mounting holes on the solar panels. This measurement will help you select the mount brackets with the appropriate hole spacing. Most solar panels have standard hole patterns, but it's always best to double - check.
Measuring for Ground - Mount Solar Mount Brackets
Step 1: Select the Installation Site
Choose a flat and well - drained area for the ground - mount installation. The site should have maximum sunlight exposure throughout the day. Clear the area of any debris, rocks, or vegetation.
Step 2: Mark the Layout
Similar to rooftop installations, mark the layout of the solar panels on the ground. Use stakes and string to outline the area where the panels will be installed. Consider the panel spacing and orientation for optimal sunlight capture.
Step 3: Measure the Ground Dimensions
Measure the length and width of the installation area. This will help you determine the number of mount brackets needed and the overall size of the ground - mount system.
Step 4: Determine the Post Depth
For ground - mount systems, the mount brackets are often attached to posts that are buried in the ground. Measure the depth at which the posts need to be buried. This depth depends on the soil type and the height of the solar panels. In general, the posts should be buried at least 2 - 3 feet deep for stability.
Step 5: Measure the Post Spacing
Measure the distance between the posts. The post spacing should be consistent with the panel layout and the size of the mount brackets. Mark the positions of the posts on the ground.
Measuring for Tracking System Mount Brackets
Step 1: Understand the Tracking System
Tracking systems allow solar panels to follow the sun's movement, increasing energy production. There are two main types of tracking systems: single - axis and dual - axis. Before measuring, understand the type of tracking system you are using and its specifications.
Step 2: Measure the Tracking Range
Determine the tracking range of the system. This includes the angle of rotation for single - axis systems or the combination of horizontal and vertical rotation for dual - axis systems. Measure the maximum and minimum angles of rotation to ensure that the mount brackets can accommodate the movement.
Step 3: Measure the Mounting Points
Similar to other types of installations, mark the mounting points for the tracking system on the surface (rooftop or ground). Measure the distance between the mounting holes on the tracking system and select the appropriate mount brackets.
Importance of Accurate Measurements
Accurate measurements are crucial for several reasons. Firstly, they ensure that the solar mount brackets fit properly, providing a secure and stable installation. A poorly - fitting mount bracket can lead to panel misalignment, which can reduce energy production and increase the risk of damage to the panels.
Secondly, accurate measurements help in selecting the right type and size of mount brackets. Using the wrong brackets can result in structural instability, especially in areas with high winds or heavy snow loads.
Finally, precise measurements contribute to the overall efficiency of the installation process. When the measurements are correct, the installation can be completed more quickly and with fewer errors, saving time and money.
Conclusion
Measuring for solar mount brackets is a critical step in the solar panel installation process. By following the steps outlined above and considering the specific requirements of your installation site, you can ensure a successful and efficient installation. As a solar mount bracket supplier, I am committed to providing high - quality products that meet your measurement needs.
If you are interested in purchasing solar mount brackets or have any questions about the measurement process, please feel free to contact us. We are here to assist you in finding the right solutions for your solar energy project.
References
- Solar Energy Industries Association (SEIA). "Solar Installation Best Practices."
- National Renewable Energy Laboratory (NREL). "Solar Panel Mounting Systems: Design and Installation."