Hey there! As a supplier of C-Purlin Solar Structure, I'm super stoked to share with you how to install this awesome setup on a curved roof. It might sound a bit tricky at first, but with the right know - how, you'll have your solar panels up and running in no time.
Understanding the Basics
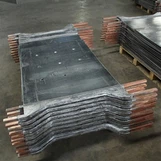
Before we jump into the installation process, let's quickly go over what C - Purlin Solar Structure is. It's a type of support system for solar panels. The C - purlins are shaped like the letter "C" and are made of high - strength steel. They're designed to provide a stable base for your solar panels, ensuring they can withstand various weather conditions.
Now, curved roofs are a bit different from flat ones. The curvature means you need to take extra care when installing the C - Purlin Solar Structure. But don't worry, it's definitely doable.
Tools and Materials You'll Need
First things first, gather all the tools and materials you'll need for the installation. Here's a quick list:
- C - purlins: Obviously, you'll need these to support the solar panels. Make sure they're the right size and thickness for your project.
- Measuring tape: You'll need to measure the roof accurately to ensure the purlins are installed in the right places.
- Drill: A good quality drill is essential for making holes in the roof and attaching the purlins.
- Screws and bolts: These will be used to secure the purlins to the roof and to connect the solar panels to the purlins.
- Safety equipment: This includes safety glasses, gloves, and a harness if you're working on a high roof.
Step 1: Measure the Roof
The first step in the installation process is to measure the curved roof. Use your measuring tape to measure the length, width, and curvature of the roof. You'll need to record these measurements accurately as they'll be used to determine the length and placement of the C - purlins.
It's a good idea to take multiple measurements at different points along the roof to account for any irregularities in the curvature. Once you have all the measurements, you can start planning the layout of the purlins.
Step 2: Plan the Layout of the C - Purlins
Based on the measurements you took, plan the layout of the C - purlins. The purlins should be placed in a way that provides maximum support for the solar panels. Generally, they should be placed parallel to each other and evenly spaced across the roof.
When dealing with a curved roof, you might need to cut the purlins to fit the curvature. You can use a saw to cut the purlins to the right length and shape. Make sure to wear safety glasses when cutting the purlins.
Step 3: Prepare the Roof
Before installing the C - purlins, you need to prepare the roof. This involves cleaning the roof surface to remove any dirt, debris, or loose materials. You also need to check the roof for any damage or weak spots. If you find any, you'll need to repair them before proceeding with the installation.
Step 4: Install the C - Purlins
Now it's time to install the C - purlins on the roof. Start by marking the positions of the purlins on the roof using a chalk line or a marker. Then, use your drill to make holes in the roof at the marked positions.
Insert the screws or bolts through the holes in the purlins and into the roof. Make sure the purlins are firmly attached to the roof. You might need to use a wrench to tighten the bolts.
When installing the purlins on a curved roof, you'll need to be extra careful to ensure they follow the curvature of the roof. You might need to adjust the position of the purlins slightly as you go to make sure they fit properly.
Step 5: Connect the Solar Panels to the C - Purlins
Once the C - purlins are installed, it's time to connect the solar panels to them. Most solar panels come with mounting brackets that can be attached to the purlins.
Align the mounting brackets of the solar panels with the purlins and use screws or bolts to secure them. Make sure the solar panels are level and properly aligned. You might need to use a spirit level to check the alignment.
Step 6: Check the Installation
After installing the solar panels, it's important to check the installation to make sure everything is secure and working properly. Check the connections between the solar panels and the purlins to make sure they're tight. Also, check the overall stability of the structure.
If you notice any issues, such as loose connections or a wobbly structure, you'll need to fix them before proceeding. It's better to catch and fix these issues early on to avoid any problems in the future.
Additional Considerations
When installing C - Purlin Solar Structure on a curved roof, there are a few additional things to consider.
- Weight Distribution: The curved roof might affect the weight distribution of the solar panels. Make sure the purlins are placed in a way that evenly distributes the weight of the panels across the roof.
- Wind and Snow Loads: Curved roofs can experience different wind and snow loads compared to flat roofs. Make sure the C - Purlin Solar Structure is designed to withstand these loads. You might need to consult an engineer or a professional installer for advice on this.
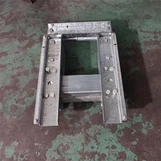
- Compatibility with Other Components: If you're using other components, such as Z-shaped Steel Purlin, Single Axis Solar Tracking Bracket, or Shaped Steel for Photovoltaic, make sure they're compatible with the C - purlins and the curved roof.
Conclusion
Installing C - Purlin Solar Structure on a curved roof might seem like a challenging task, but with the right tools, materials, and knowledge, it's definitely achievable. By following the steps outlined in this blog, you can ensure a successful installation.
If you're interested in purchasing C - Purlin Solar Structure or have any questions about the installation process, don't hesitate to reach out. We're here to help you make the most of your solar energy project. Whether you're a homeowner looking to go green or a business owner wanting to reduce your energy costs, our C - Purlin Solar Structure can be a great solution. So, get in touch and let's start this solar journey together!


References
- Solar Energy International. "Solar PV Installation Best Practices."
- National Renewable Energy Laboratory. "Roof - Mounted Solar PV Systems: Design and Installation Guide."